Zero-out and rethin VMDKs on NFS
- A workaround for rethinning
- Create multiple NFS shares for ESXi
- Mount NFS shares in ESXi
- Create a VM with extra data disk on one of NFS shares
- Ensure VM is running and /dev/sdb is usable
- Format data disk in Linux VM
- Fill up data disk
- Remove 50% of data and confirm no rethinning has happened
- Make sure Thin Provisioning is enabled on NFS storage
- Review current storage view from ESXi
- Review current VMDK location
- Move zeroed-out VMDK to another NFS share
- Observe data movement between NFS shares (or between NFS and VMFS)
- Observe capacity utilization on destination growing
- Confirm zeroed-out VMDK has been relocated
- Review current capacity utilization on vmw2
- Check storage efficiency with Thin Provisioning, Deduplication and Compression all enabled
- Optionally move VM back to the original NFS share vmw1
- Observe vmw1 utilization is going up as Linux VM is being migrated back
- Upon completion storage efficiency of vmw1 is expected to remain the same
- NFS share vmw1 after VM data was moved and with Thin Provisioning, Deduplication and Compression
- Automate
A workaround for rethinning
vSphere 7.0 requires VMFS to unmap or "rethin" disks on which data has been deleted.
If you have vSphere 6.7 or 7.0, VMDKs on NFS will grow fat.
To rethin them, we can do this for Linux VMs (for Windows, use SDelete):
- Delete empty blocks on device level (not just remove filesystem metadata)
- Move the VMDK to another data store or NFS share (and optionally back)
Let's say we have this situation in a VM's /dev/sdb mounted at /data:
$ du -sh
1.0G	.
Normally if we delete a 500 MB file with rm -rf file.bin, this will only remove filesystem metadata for the file. VMDK will still be 1 GB large, and NFS share will show it occupies 1 GB (or even more).
The first step is therefore to truly remove old data. Assuming this VMDK is 1 GB and contains 500 MB of existing data, we have close to 500 MB that can be zeroed-out:
$ dd if=/dev/null of=/data/temp-junkfile.tmp bs=1M count=450
$ rm -rf /data/temp-junkfile.tmp
This will fill it up 95% full, and then we can delete the 450 MB temporary file filled with zeroes.
At this point we can move this VM or just VMDK to another NFS share or VMFS and then optionally back.
Now, since only 500 MB of data are non-0's, if NFS server supports Thin Provisioning, VMDK can be shrunk to 500-600 MB.
With Deduplication and Compression, it could be even 300 MB.
Let's see this in practice, with ESXi 7.0U3 and NFS v3.
Initially:
- vmw1 - first NFS share, with Thin Provisioning ON, Deduplication & Compression OFF
- vmw2 - second NFS share, with Thin Provisioning ON, Deduplication & Compression ON
Create multiple NFS shares for ESXi
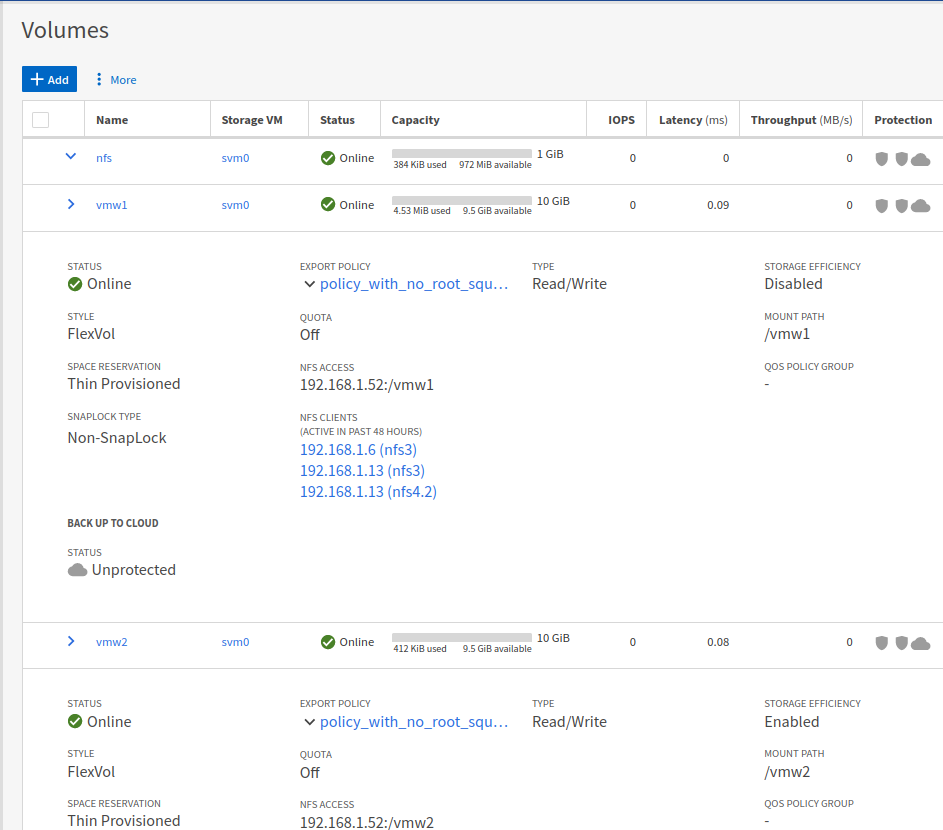
vmw1 has a tiny stub file from another app which occupies 4 MB and can be ignored. vmw2 is empty.
Mount NFS shares in ESXi
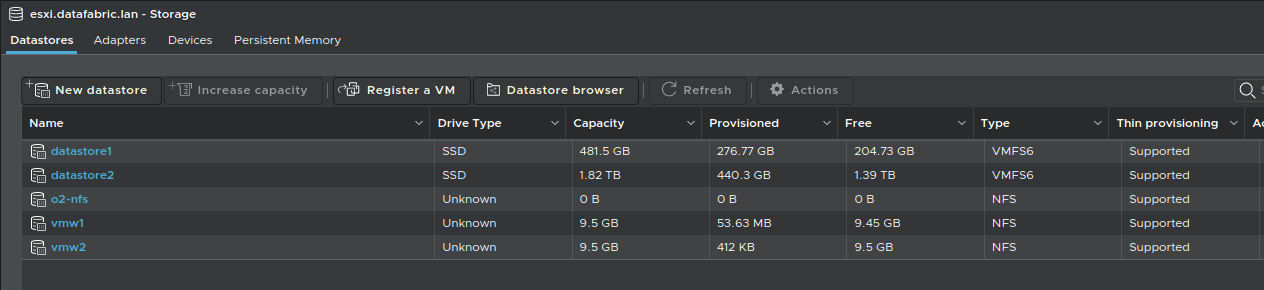
In ESXi, we mount the two NFS v3 shares. Thin Provisioning is shown as supported.
Create a VM with extra data disk on one of NFS shares
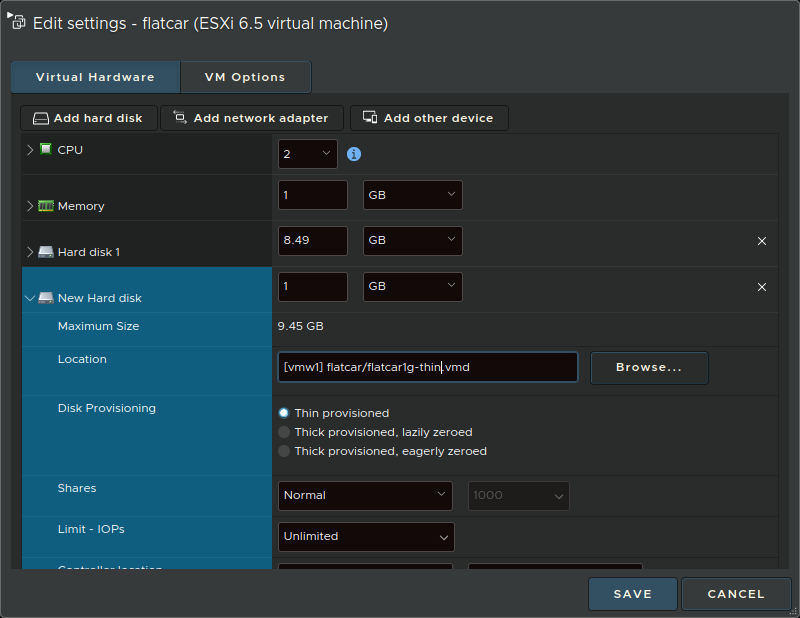
I used Kinvolk's Flatcar Linux Stable, with one disk for OS, and an other (1 GiB, Thin Provisioned) for application data
Ensure VM is running and /dev/sdb is usable
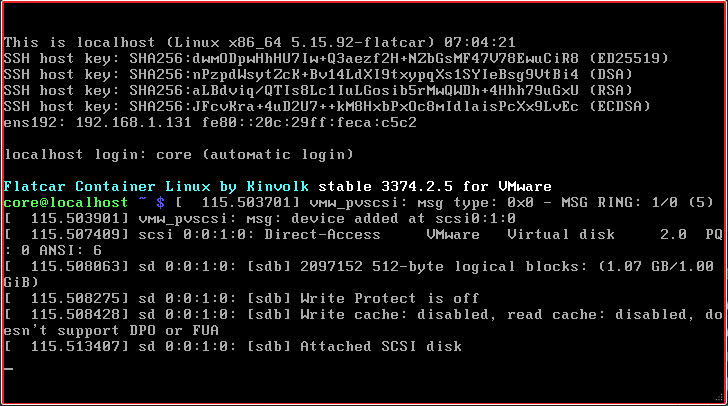
Everything is looking fine.
Format data disk in Linux VM
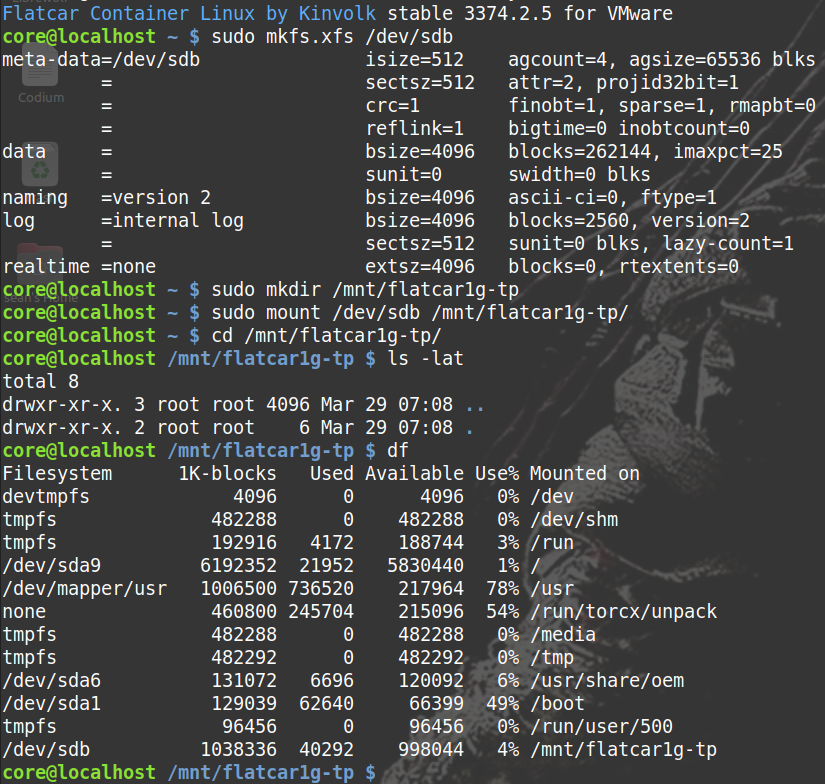
In Flatcar Linux, format data disk (/dev/sdb) and mount it (/mnt/flatcar1g-tp).
Fill up data disk
Write 950 GiB to data disk's filesystem mounted at /mnt/flatcar1g-tp to fill it up, and observe capacity utilization of the NFS share vmw1.

It's close to 2 GB (~1 GB OS, ~1 GB data).
Remove 50% of data and confirm no rethinning has happened
Remove part of data (e.g. 475 MiB out of 950 MiB).
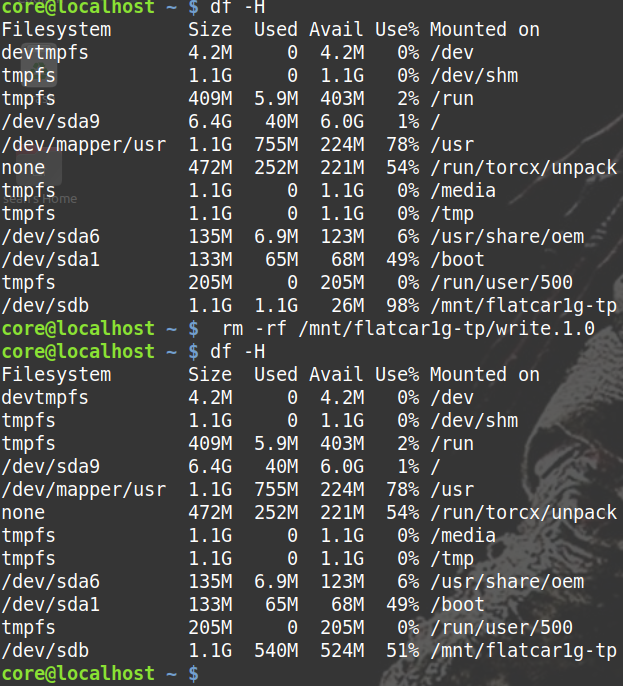
Capacity utilization on the NFS share vmw1 should remain unchanged because unmap can't work.
Make sure Thin Provisioning is enabled on NFS storage
If you haven't, enable Thin Provisioning on both vmw1 and vmw2.
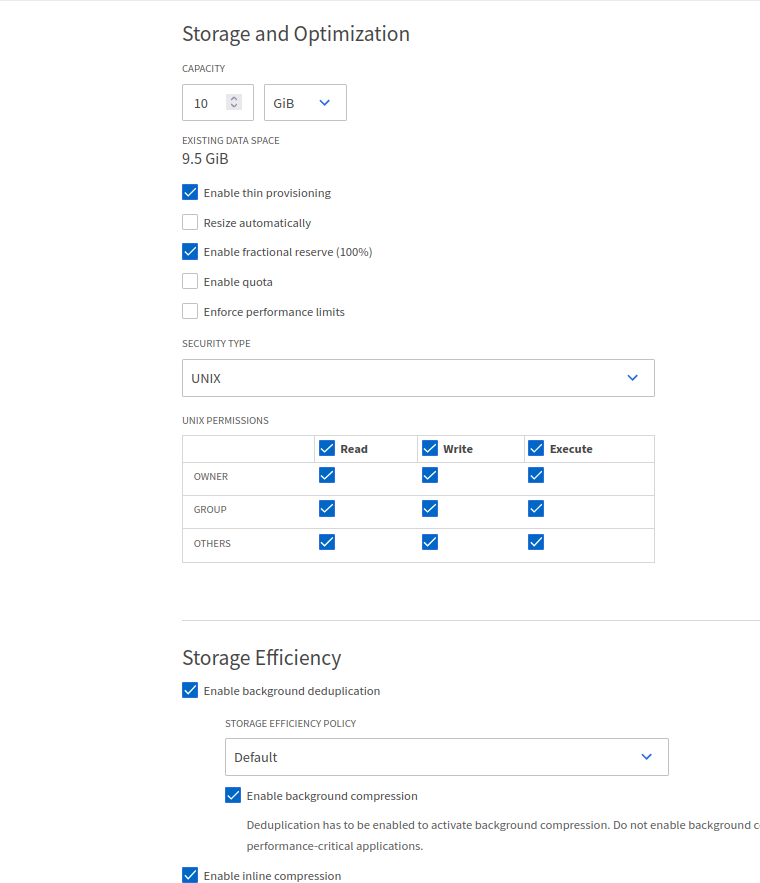
Optionally enable Deduplication and Compression (under Storage Efficiency).
Review current storage view from ESXi
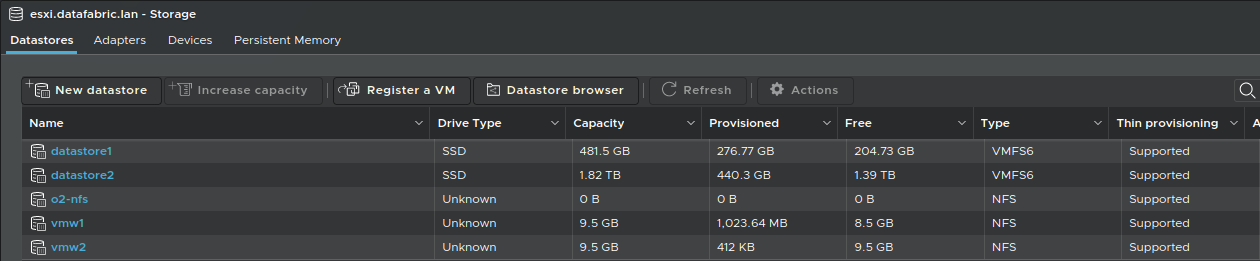
It should be the same as before, because:
- Inline compression had no effect on existing data
- Background compression hasn't had time to run
- ESXi 7 and 6.7 don't support unmap on NFS
Review current VMDK location
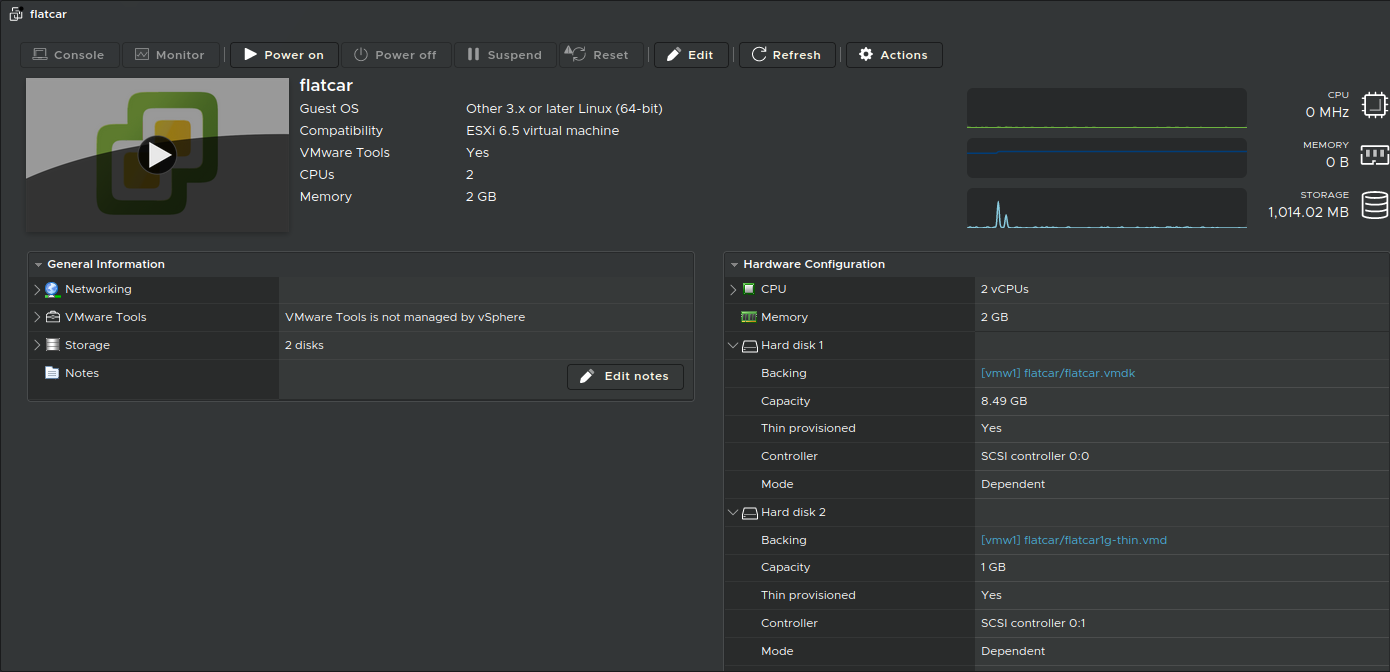
They're both on vmw1.
Move zeroed-out VMDK to another NFS share
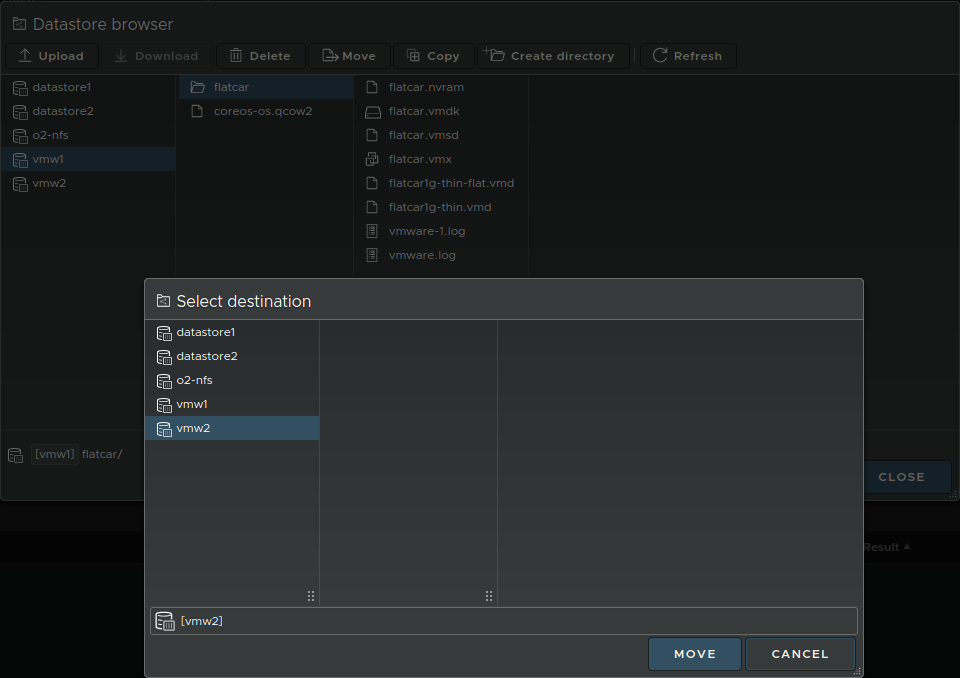
The OS VMDK hasn't been zeroed out, but it doesn't matter - we'll move both to vmw2.
Observe data movement between NFS shares (or between NFS and VMFS)
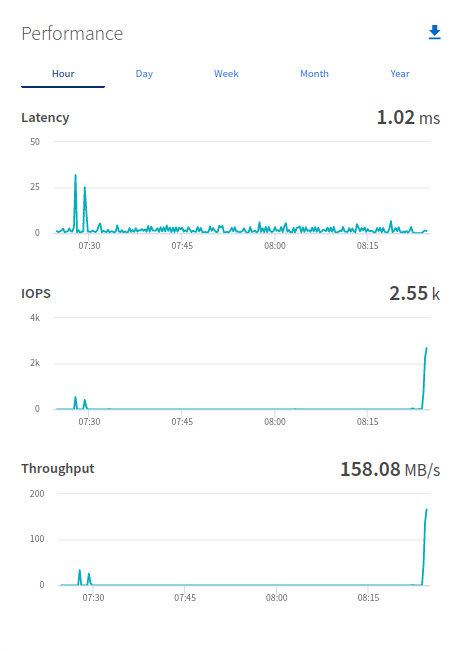
Observe capacity utilization on destination growing
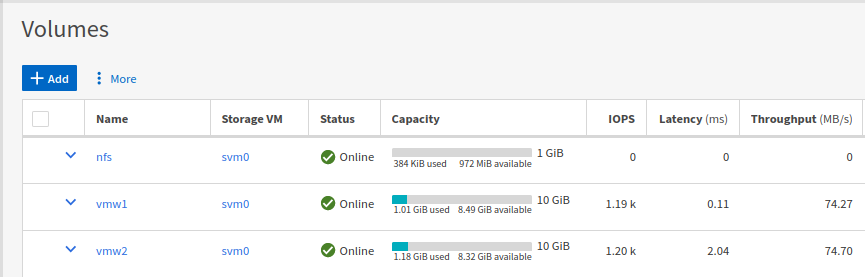
Confirm zeroed-out VMDK has been relocated
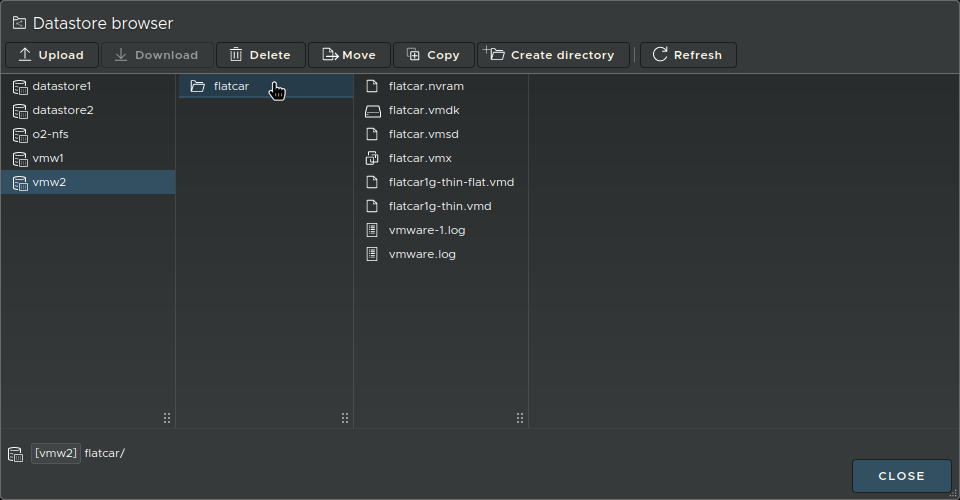
Review current capacity utilization on vmw2
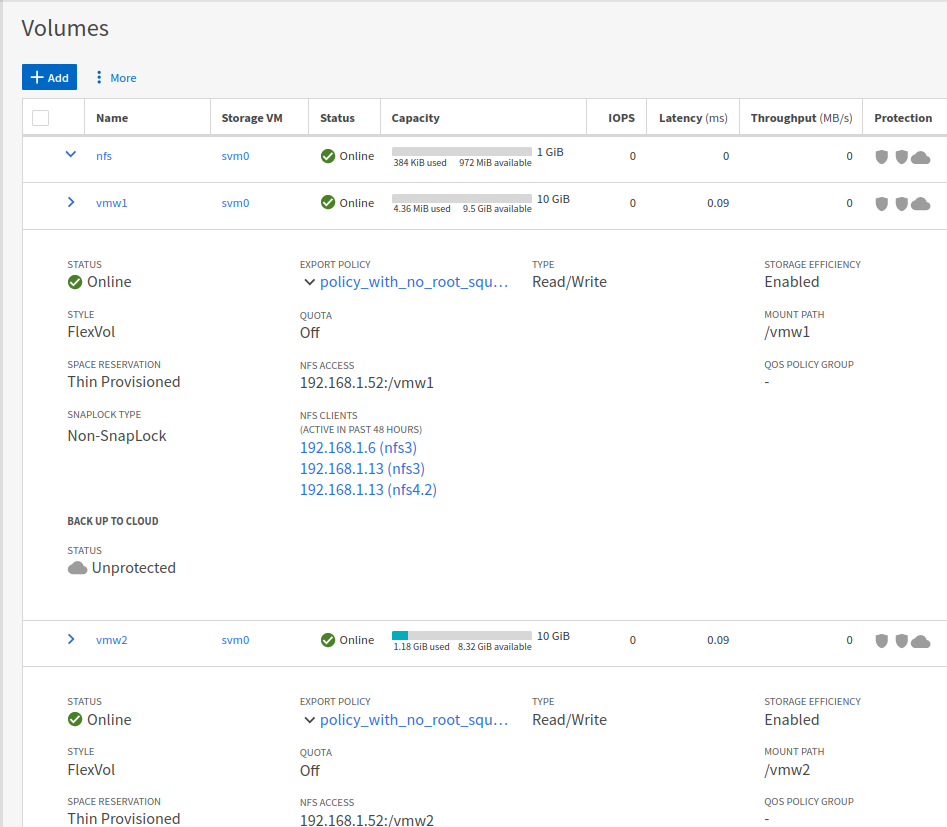
It's smaller than before? WTF is going on?
- As VMware moved data zeroed-out blocks were compressed to nothing and deduplicated
- Thin Provisioning could provision smaller files
- OS data was unchanged, but both it and data on data disk got deduplicated and compressed
Check storage efficiency with Thin Provisioning, Deduplication and Compression all enabled
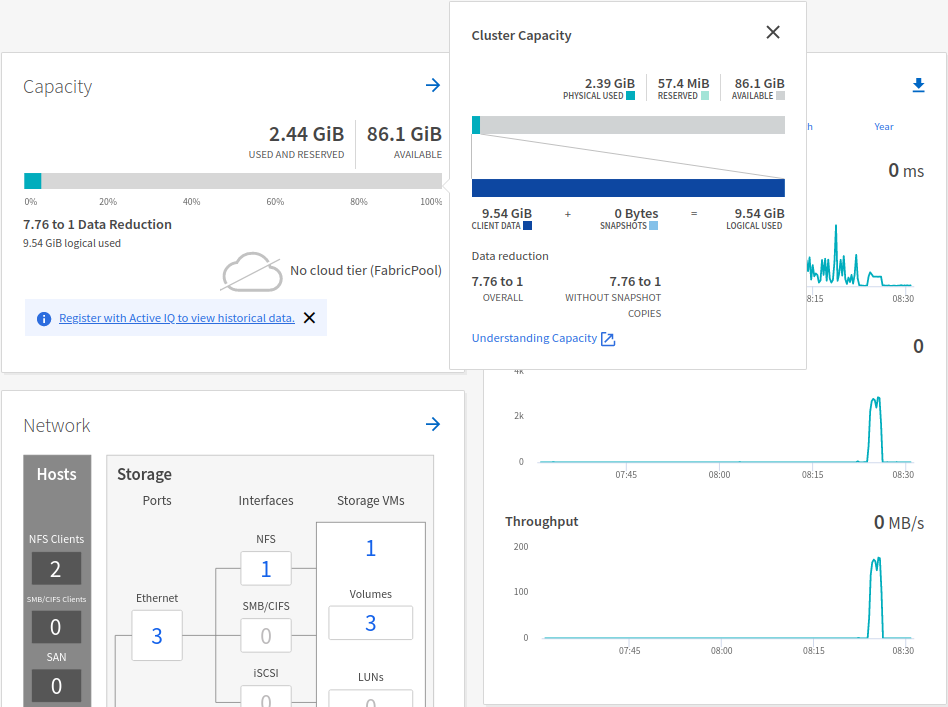
This is now good. If multiple copies of Flatcar Linux were installed, it'd be even better.
Optionally move VM back to the original NFS share vmw1

This is optional, but overall a good idea because you don't have to wonder where your VM normally lives.
If you automate this, you can move back and forth in the same script, so that the VM resides on vmw2 just a few seconds.
Observe vmw1 utilization is going up as Linux VM is being migrated back
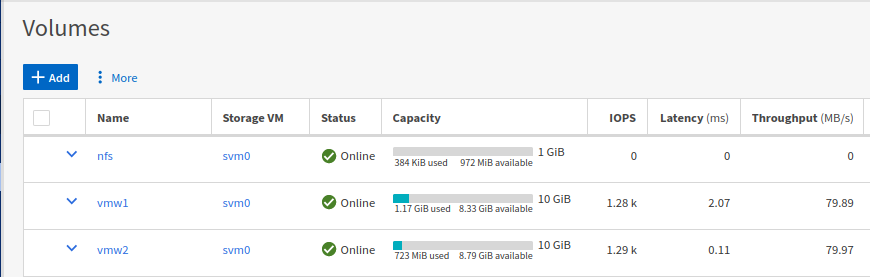
Upon completion storage efficiency of vmw1 is expected to remain the same
(The screenshot shows 2.5 GB used because it was taken while VM was being copied.)
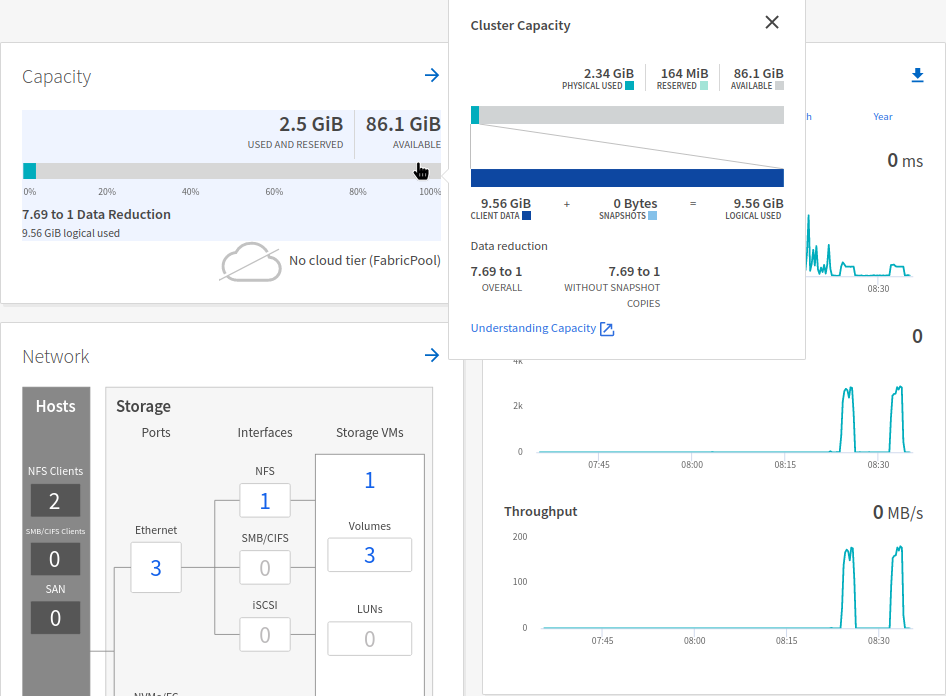
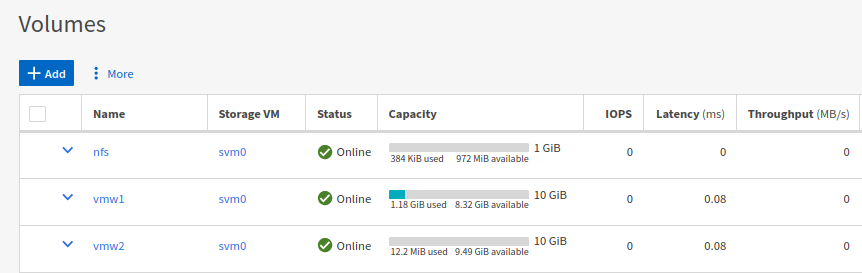
When we started, vmw1 had Deduplication and Compression both disabled, but now - apart from that 4 MB stub file - the settings on vmw2 and vmw1 are identical - Thin Provisioning, Deduplication and Compression are enabled across the board.
NFS share vmw1 after VM data was moved and with Thin Provisioning, Deduplication and Compression
Automate
This is easy to automate with Power CLI or other tools.
I'd move VMs once a week, maybe over weekend.
If there's hundreds of them, then maybe 100 every night.
Each VM "owner" should zero out their disks with big churn, and be careful to not fill them up. Dynamic determination should be better, e.g. obtain available space in bytes, deduct 10%, then use dd:
$ df | grep '/sqldata' | awk '{ print $4}'
4208640
The above is an example of how /home/brandon/yuge_junk_dir/sqldata can mess your script up. If you can't do it right, it's best to use a fixed conservative value (20% of volume size) and review it once a month.
Also set up some OS monitoring to watch OS and data disk utilization of these VMs.